Working With Contrast in The Highlights

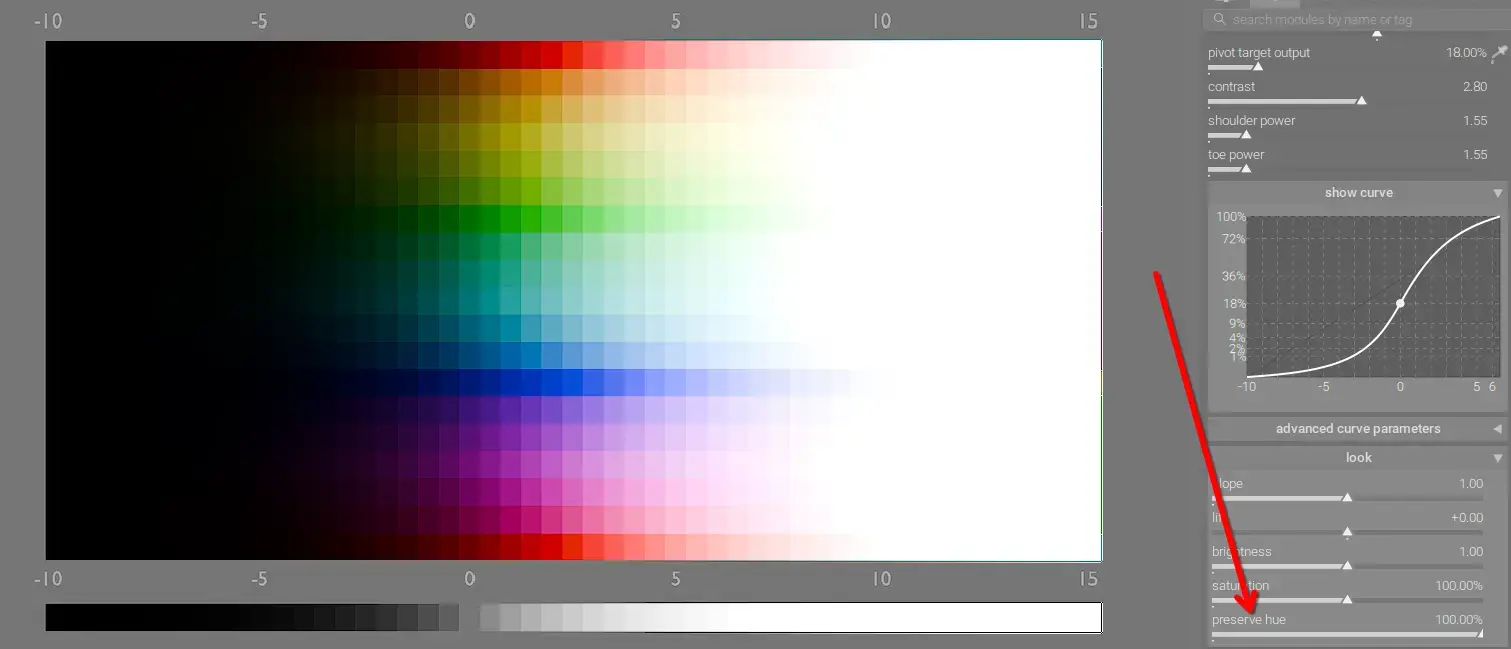
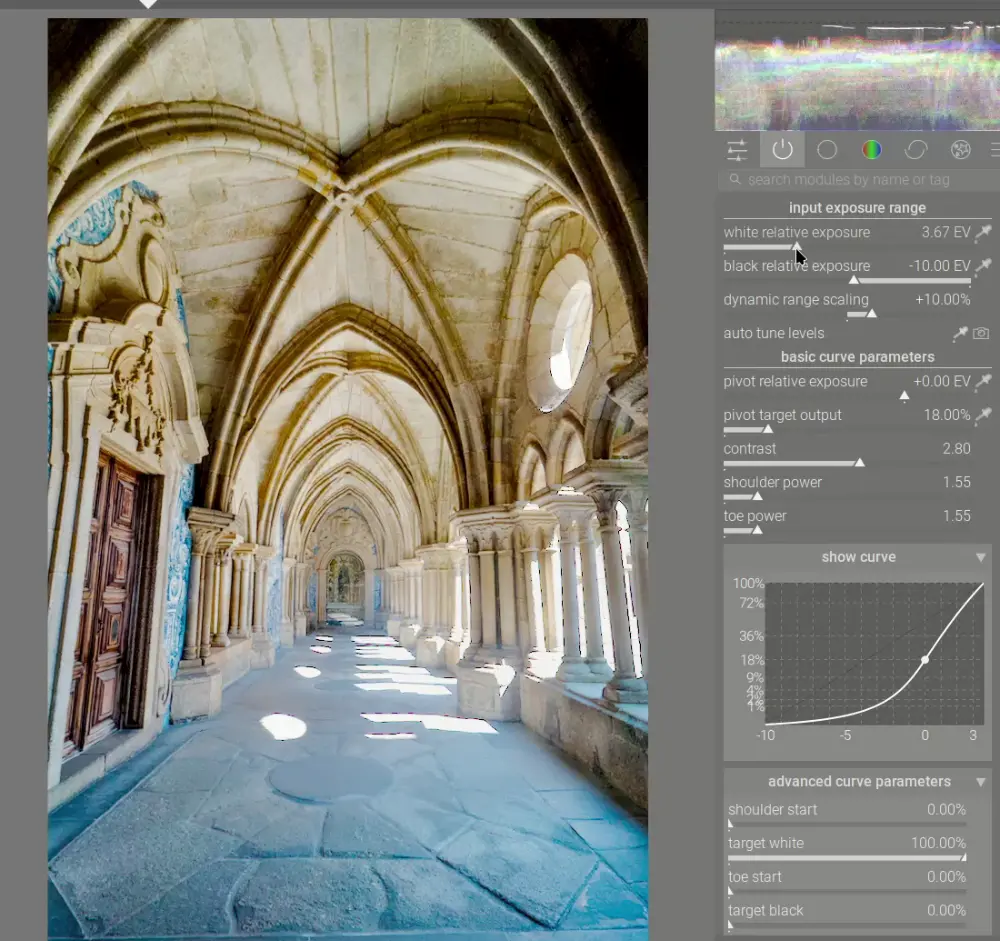
As we recently discussed, the new AgX module gives you fine-grained control over the highlights. However, additional steps may be required to really bring out the details in very bright areas like the sky. Let's look at several techniques for enhancing contrast in the highlights below.