Introduction
I find myself frequently working in high-contrast scenes which makes post-processing a challenge since adjustments to the exposure wreak havoc with colors and I often want to only selectively modify part of the image. Fortunately, Darktable's deeply-integrated LAB support and powerful parametric masks make these difficult shots easy to work with. Below I present the rough outline of my standard workflow while processing the original RAW image to the result you see above.
For more information on processing in LAB, I highly recommend Photoshop LAB Color: The Canyon Conundrum by Dan Margulis.
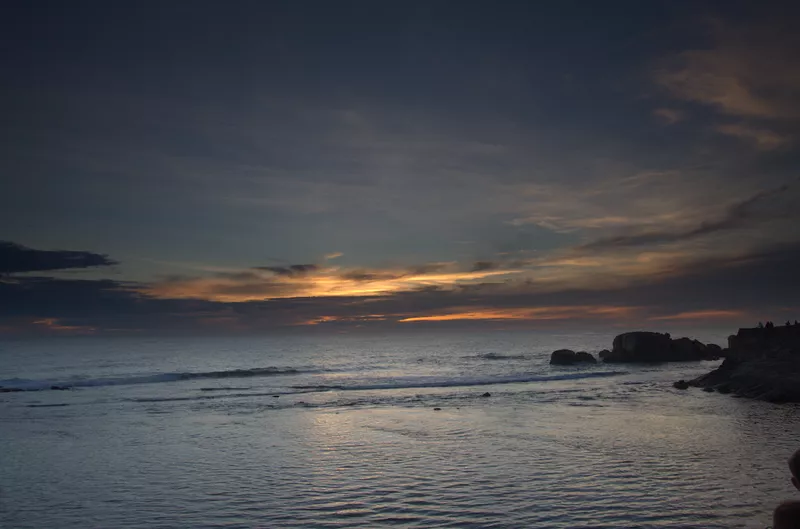
Original
This is the original image as shot:
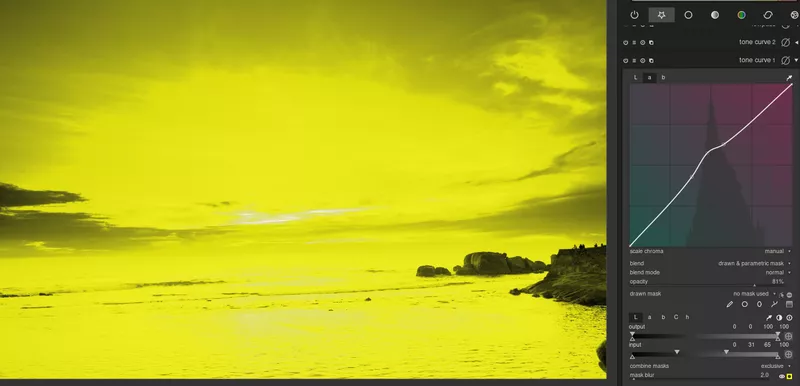
Tone Curve - L
I spend a lot of time using the Tone Curve module, often using multiple instances of it in order to perform several different adjustments.
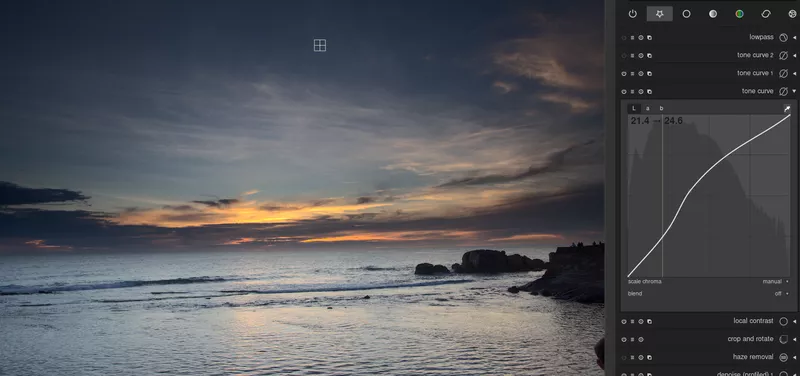
The first adjustment I make is to the overall exposure using the L channel. I select the color picker from the module and click a point that looks like it is nearly completely white and another that looks completely black. I gauge based on where it shows these are on the tone curve if the image needs exposure adjustment: a white value should be around 95-100 and a black value between 5-10; if either is below or above those ranges, I adjust the line using an S-curve to achieve the correct exposure. For this particular image, the white and black points looked good, however I wanted to create more contrast in the sky. To do this, I clicked on two points of blue in the sky - a light blue and a dark blue, and then I adjusted that section of the curve to be steeper and a slight S-curve shape. This had the effect of brightening the sky and giving more definition to the clouds.
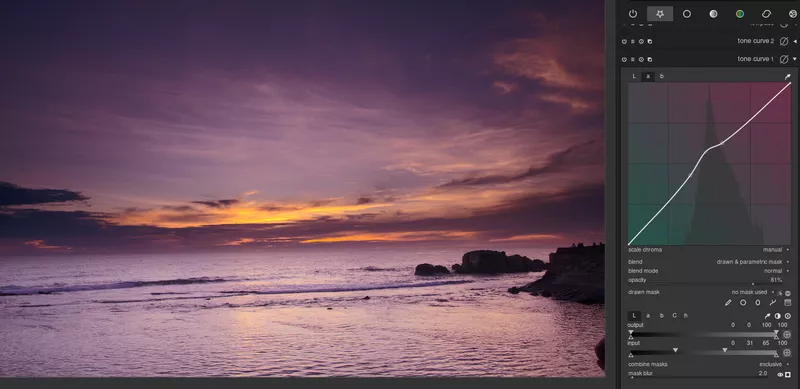
Tone Curve - AB
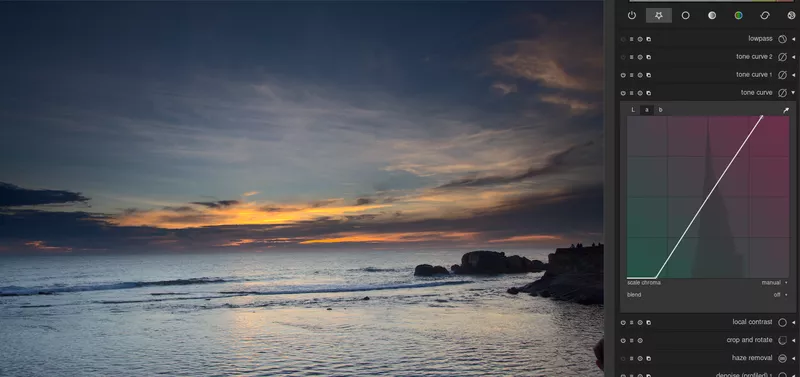
Next, I steepen the curve on both the A and B channels to increase saturation. Note that at this point you can also pick a white or black point and see if it is in the very middle of the curve. If not, there is a color cast that needs to be corrected by dragging the curve so that the white or black point is in the middle. In this case, I didn't need to adjust for a color cast.
Tone Curve - Parametric Masks
Darktable's parametric masks are a very powerful too that make it stand apart from Lightroom, which lacks this type of selective module application and relies on Photoshop to do this (though in a much more time-consuming manner). I frequently use a number of parametric masks on an image, and sometimes combine them with drawn masks for more precision. It is really powerful to be able to apply an adjustment to just a part of an image based on specific attributes (e.g. only the highlights, only the areas with a certain saturation, only a certain color, etc).
This parametric mask applies the Tone Curve module changes to only pixels in the middle of the curve, leaving the very dark pixels and very light pixels alone. Because digital sensors have a more limited dynamic range than the human eye, this photo is lacking some of the color that I originally saw. I would like to restore this as well as add some artistic license to the scene. To achieve, this, I want to change the blue in the darker parts of the sky to more of a purple. As you can see, this parametric mask is applying the changes to just this part of the image (as well as the sky's reflection in the water).
As before with the L channel (except this time on the A channel), I used the color picker to find the range of colors in the sky. Once found, I pulled those pixels towards the red part of the A channel. This causes the selected pixels to take on more of a purple hue.
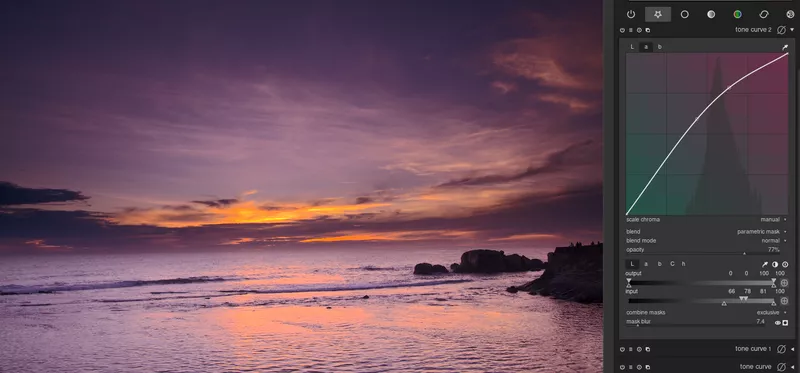
After adjusting the darker pixels, I would also like to add some orange to the brightest part of the sky, which originally is a pretty bland yellow. Again, I used a parametric mask to select the parts I wanted and then pulled up the A channel at those points to turn the yellow to orange. Notice how the parametric mask does not include the brightest pixels - this ensures that the very brightest parts remain yellow and only the slightly darker parts are changed to orange. It is also amazing how much more color isreflected in the water by making this adjustment.
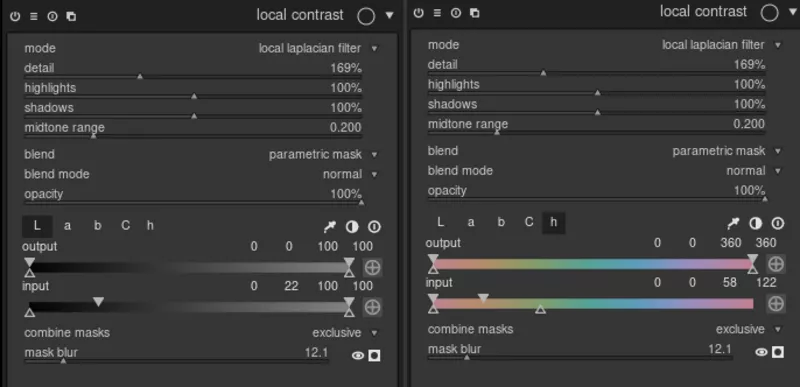
Local Contrast
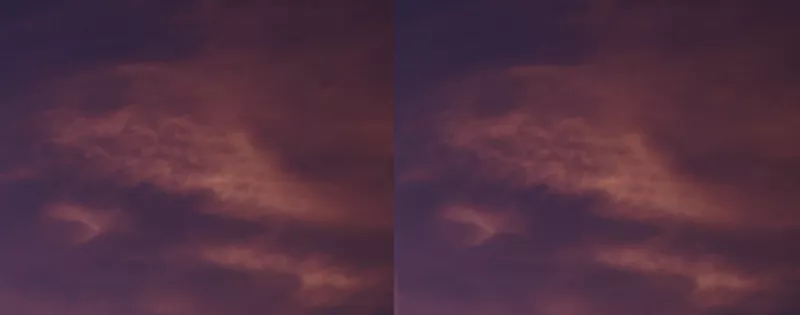
The Local Contrast module allows you to enhance detail. In this case, I am only interested in making the clouds have more contrast, as seen in the before and after above (it is a little subtle). This time, I used a parametric mask plus a drawn mask to select just the area I was interested in. Moreover, as seen below I created the mask using both the L channel as well as the hue:
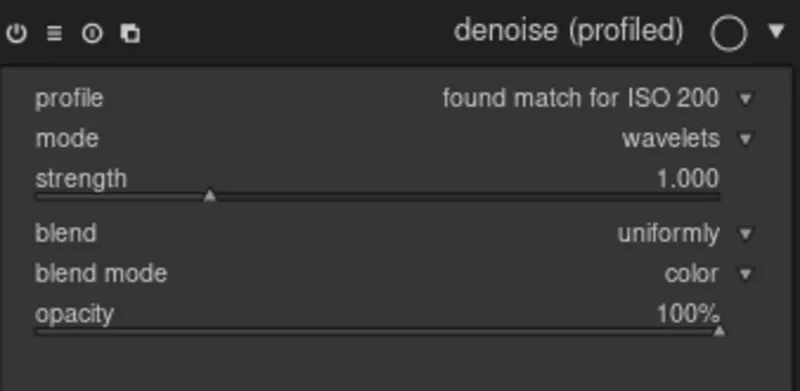
Denoise - AB
A common way of correcting for noise (in RGB) is to blur the image slightly. This works, but results in a loss of detail. Often times (but not always), the most visible noise on an image is chroma noise. The beauty of LAB is that color data is separate from luminosity, so if you blur the A and B channels, you can often eliminate color noise without losing any detail (which is contained in the L channel)! The Denoise (profiled) module allows you to achieve this with the following settings. Note in particular the blend mode being set to color which will only apply it to the A and B channels. Read more in the module's documentation to see why wavelets is the best mode choice here.
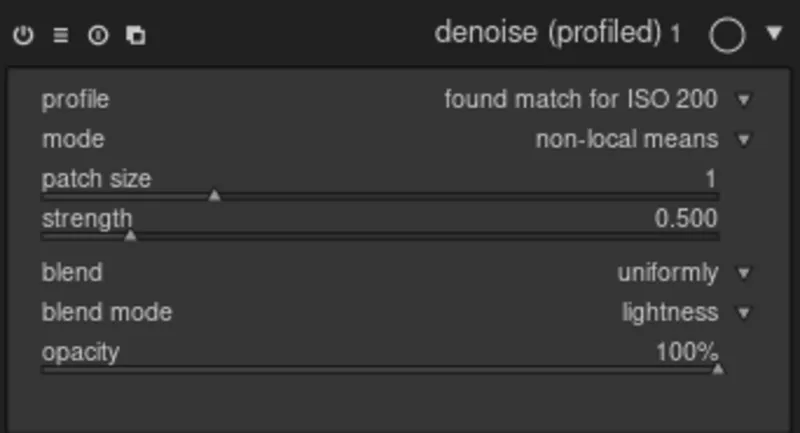
Denoise - L
Unfortunately this image still had noise after blurring the A and B channels, so some correction in the L channel is also required. Once again, the Denoise (profiled) module works well here. Note that this time blend mode is set to lightness to only operate on the L channel. Read more in the module's documentation to see why non-local means is the best mode choice here.
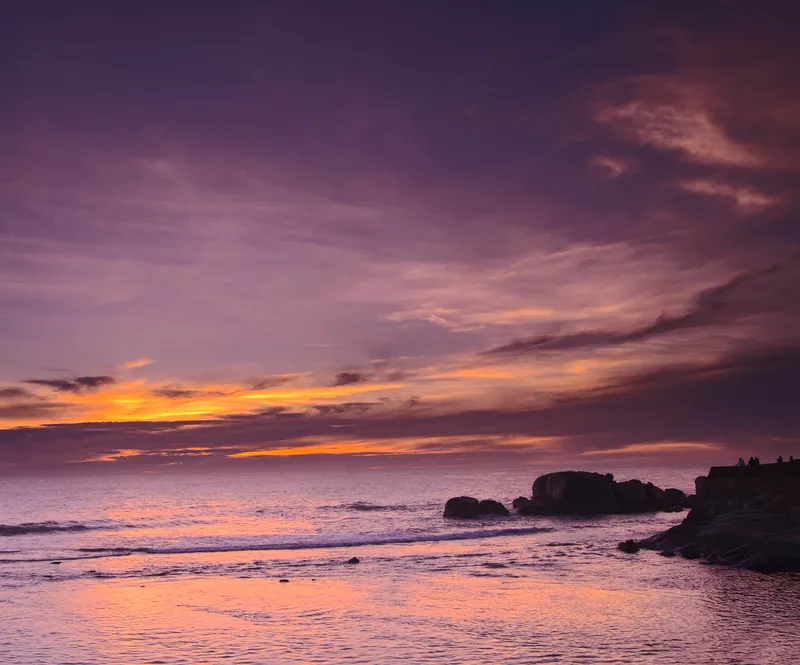
Final
After the above changes and a crop, we have the following image which has more contrast, color, and interesting features.